
Step By Step Guide For DIY Wheel Cleaning
Taking care of your wheels is essential for maintaining their appearance and longevity. Regular wheel cleaning not only enhances the overall look of your vehicle but also helps prevent damage from brake dust and road grime.
In this DIY wheel cleaning guide, we will walk you through the step-by-step process, highlighting the necessary tools, materials, and techniques to achieve optimal results. By following these simple steps, you can keep your wheels looking their best and protect them from the elements.
Wheel Cleaning Steps
Here’s a step-by-step guide for DIY wheel cleaning:
Tools and Materials Needed: Wheel brush or soft-bristle brush, Wheel cleaner solution, Bucket of water, Microfiber towels or sponges ,Wheel wax or sealant (optional), Tire dressing (optional), and Gloves (optional).
Step 1: Preparation Ensure that your vehicle is parked in a well-ventilated area away from direct sunlight. Gather all the necessary tools and materials mentioned above.
Step 2: Rinse the Wheels Start by rinsing the wheels with a hose or pressure washer to remove loose dirt and debris. This step will help prevent scratching the surface during the cleaning process.
Step 3: Apply Wheel Cleaner Spray the wheel cleaner solution onto the surface of the wheels, focusing on one wheel at a time. Make sure to follow the instructions provided by the manufacturer regarding the application and dwell time.
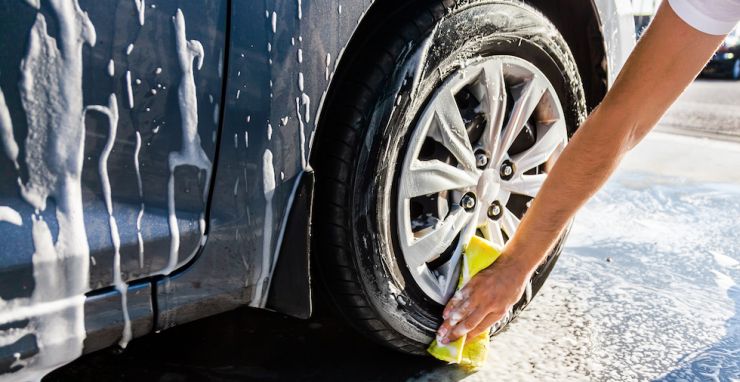
Step 4: Scrub the Wheels Using a wheel brush or a soft-bristle brush, scrub the wheel’s surface, paying attention to areas with heavy dirt or brake dust buildup. Work in a circular motion to agitate the cleaner and remove grime effectively. Don’t forget to clean the tire sidewalls as well.
Step 5: Rinse Thoroughly After scrubbing, rinse the wheel thoroughly with water to remove the cleaner and loosened dirt. Make sure to remove all traces of the cleaner, as leaving it on the wheels for too long can damage the finish.
Step 6: Dry the Wheels Use a clean microfiber towel or sponge to dry the wheels completely. Ensure there is no standing water left, as it can cause water spots or streaks.
Step 7: Apply Wheel Wax or Sealant (optional) If desired, you can apply a wheel wax or sealant to protect the wheels from future dirt and brake dust buildup. Follow the instructions provided by the product manufacturer for application.
Step 8: Apply Tire Dressing (optional) For a finished look, you can apply a tire dressing to the sidewalls of the tires. This will provide a glossy appearance and protect against UV damage. Apply the dressing as per the product instructions.
Step 9: Repeat for Other Wheels Repeat steps 3-8 for each remaining wheel until all the wheels are clean, dry, and protected (if applicable). Note: It’s advisable to wear gloves while handling cleaning chemicals to protect your hands from potential skin irritation.
Conclusion
By dedicating some time to clean your wheels regularly, you can preserve their shine and protect them from the harmful effects of brake dust and dirt. This step-by-step guide has provided you with the tools, materials, and techniques necessary for a successful DIY wheel cleaning. Remember to follow the instructions on the cleaning products, rinse thoroughly, and take precautions to avoid any potential damage. With proper care, your wheels will not only maintain their aesthetic appeal but also have an extended lifespan, contributing to the overall beauty and value of your vehicle. So, get started and enjoy the satisfaction of seeing your wheels gleam like new.